To provide the user the access to the service, the A. Championship & Tournament application (mobile and desktop) causes the user's Electronic Devices to automatically access the Internet. It is therefore necessary that an internet connection is present and active on the user's device.
Section L: User Profile
The use of the features provided by the A. Championship & Tournament applications is bound by the registration of a user profile. This registration can only take place in four ways:
Direct registration on the A. Championship & Tournament platform (Paragraph L.1).
Registration through the use of the Google account (Paragraph L.3).
Registration through the use of the Facebook account (Paragraph L.4).
Anonymous registration through the use of the profile-without-account (Paragraph L.5).
L.1: Registration
![]() From
the Login screen, that is the first screen that appears when using
the application for the first time, press "Have no Account?
Sign Up for free". The user is led to the registration
screen where he is required to perform the following actions:
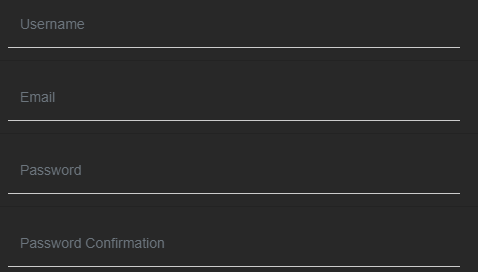
From
the Login screen, that is the first screen that appears when using
the application for the first time, press "Have no Account?
Sign Up for free". The user is led to the registration
screen where he is required to perform the following actions:
Provide a username that meets the following criteria:
 must
consist of at least 8 characters;
must
consist of at least 8 characters;must consist of a maximum of 23 characters;
must not already be used as a username of other previously registered User Profiles.
Provide an e-mail address through which the identity of the user who is registering will be confirmed. The email address must meet the following criteria:
it must not have already been used for the creation and confirmation of an existing User Profile;
it must be an existing email address that the user can access to confirm registration.
Provide a password that meets the following criteria:
must consist of at least one lowercase character;
must consist of at least one uppercase character;
is composed of a numeric character;
is composed of at least one special character;
is composed of at least 8 characters.
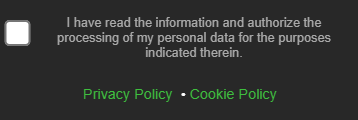 Confirm
reading of the Privacy Policy and Cookie Policy and authorize the
processing of the data provided for the purposes indicated therein.
Confirm reading the Terms and Conditions and agree to them.
Confirm
reading of the Privacy Policy and Cookie Policy and authorize the
processing of the data provided for the purposes indicated therein.
Confirm reading the Terms and Conditions and agree to them. Optionally
accept the subscription to the A. Championship & Tournament
newsletter.
Optionally
accept the subscription to the A. Championship & Tournament
newsletter.
The user can send the data entered by clicking on "Sign Up". It is possible to perform this action only after completing all the required fields.
![]() If,
after sending, the data is successfully validated by the server, an
"unconfirmed" User Profile is automatically created. In
this state, the User Profile is not enabled to access the application
features, so registration is not to be considered completed.
If,
after sending, the data is successfully validated by the server, an
"unconfirmed" User Profile is automatically created. In
this state, the User Profile is not enabled to access the application
features, so registration is not to be considered completed.
Activation takes place only with the acceptance, by the user, of the confirmation message received at the email address provided. Confirmation takes place when the User navigates to the web address (link) contained in the confirmation message received via email.
Upon confirmation of registration, the activation of the User Profile immediately follows, which will finally be enabled to access the application features by providing their credentials on the Login screen (Paragraph L.2).
L.2: Login
From the Login screen the user can perform the following operations:
Access the application functions without performing a User Profile registration (available only on the mobile application) (Paragraph L.6).
Register and / or access the User Profile through a Google account (Paragraph L.4).
Register and / or access the User Profile through a Facebook account (Paragraph L.5).
 Log
in to the
User Profile using traditional authentication by providing username
and password configured during registration (Paragraph L.1).
Log
in to the
User Profile using traditional authentication by providing username
and password configured during registration (Paragraph L.1). Access
the registration screen (Paragraph L.1).
Access
the registration screen (Paragraph L.1).

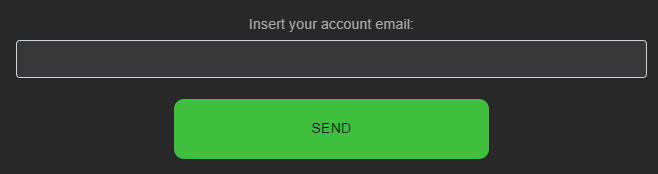 Request
a password
reset
due to the inability to remember and / or enter the password
configured during registration. Here the
user is
asked to enter the email address associated with the User Profile
whose password he
intend to reset and click on "Send" to send the new
temporary password to that address. The user can use this new
password to access the User Profile and can reconfigure it in the
Preferences screen (Paragraph L.5).
Request
a password
reset
due to the inability to remember and / or enter the password
configured during registration. Here the
user is
asked to enter the email address associated with the User Profile
whose password he
intend to reset and click on "Send" to send the new
temporary password to that address. The user can use this new
password to access the User Profile and can reconfigure it in the
Preferences screen (Paragraph L.5).
L.3: Google Sign in
![]() From
the Login screen, press the red "Sign
In"
button with the Google symbol to log in through Google Single
Sign-On. If the user is already registered with the selected Google
account, he will be directly logged into the User Profile. If no User
Profile has been previously registered associated with the selected
Google account, the
user
will be prompted to perform two actions:
From
the Login screen, press the red "Sign
In"
button with the Google symbol to log in through Google Single
Sign-On. If the user is already registered with the selected Google
account, he will be directly logged into the User Profile. If no User
Profile has been previously registered associated with the selected
Google account, the
user
will be prompted to perform two actions:
confirm the reading of the Privacy Policy and the Cookie Policy and authorize the processing of the data provided for the purposes indicated therein; also confirm reading the Terms and Conditions and agree to them;
optionally accept the subscription to the A. Championship & Tournament newsletter.
At the end of the registration, the User Profile is created and automatically activated, and then enabled to access the application features. The username is generated from the email address of the Google account (excluding the domain) except in the event that the same username is already associated with another User Profile. In this case, a series of numeric, random and unique characters is automatically added to the username. Once logged in, the user can change their username in the Preferences screen (Paragraph L.5) as long as the new username meets the criteria indicated therein.
L.4: Facebook Sign in
 From
the Login screen, press the blue "Sign
In"
button with the Facebook symbol to log in through Facebook Single
Sign-On. If the user is already registered with the selected Facebook
account, he will be directly logged into the User Profile. If no User
Profile has been previously registered associated with the selected
Facebook account, the
user
will be prompted to perform two actions:
From
the Login screen, press the blue "Sign
In"
button with the Facebook symbol to log in through Facebook Single
Sign-On. If the user is already registered with the selected Facebook
account, he will be directly logged into the User Profile. If no User
Profile has been previously registered associated with the selected
Facebook account, the
user
will be prompted to perform two actions:
confirm the reading of the Privacy Policy and the Cookie Policy and authorize the processing of the data provided for the purposes indicated therein; also confirm reading the Terms and Conditions and agree to them ;
optionally accept the subscription to the A. Championship & Tournament newsletter.
At the end of the registration, the User Profile is created and automatically activated, and then enabled to access the application features. The username is generated from the email address of the Facebook account (excluding the domain) except in the event that the same username is already associated with another User Profile. In this case, a series of numeric, random and unique characters is automatically added to the username. Once logged in, the user can change their username in the Preferences screen (Paragraph L.5) as long as the new username meets the criteria indicated therein.
L.5: User preferences
 From
the Home screen, which is the first screen that appears after
accessing the application, press the "Account preferences"
button. From here the user can perform the following operations:
From
the Home screen, which is the first screen that appears after
accessing the application, press the "Account preferences"
button. From here the user can perform the following operations:
Change the language of the application (available only on the mobile application). The languages available on the mobile application are: English, Spanish, Italian and French. This action is the only operation available to the user who is using the mobile application without having registered.
View information related to the account (such as the email address associated with the User Profile).
 Enable
/ Disable the newsticker in the championship screen
(available only on the Desktop application).
Enable
/ Disable the newsticker in the championship screen
(available only on the Desktop application).Change the username, in compliance with the criteria for creating a username indicated in Paragraph L.1.
Reset the password by first entering the password in use and then the desired new password, which must be formulated in compliance with the criteria indicated in Paragraph L.1.
View the Privacy Policy, Cookie Policy and Terms and Conditions.
 Proceed
with the
cancellation of the User Profile
indicating the reason in the appropriate confirmation window. Upon
completion of this action, a confirmation message will be sent to
the email address associated with the User Profile. As long as the
user does not confirm the cancellation through the link provided in
the message received by email, the User Profile continues to exist
and remain active. Upon confirmation of the cancellation through the
link received via email, the removal of the User Profile becomes
effective, which will result in the definitive deletion of all data
associated with the User Profile (torunaments
of which the User Profile is owner, matches, players, teams,
preferences , etc ...) and the inability to access the application
features with the credentials of the User Profile just deleted.
Proceed
with the
cancellation of the User Profile
indicating the reason in the appropriate confirmation window. Upon
completion of this action, a confirmation message will be sent to
the email address associated with the User Profile. As long as the
user does not confirm the cancellation through the link provided in
the message received by email, the User Profile continues to exist
and remain active. Upon confirmation of the cancellation through the
link received via email, the removal of the User Profile becomes
effective, which will result in the definitive deletion of all data
associated with the User Profile (torunaments
of which the User Profile is owner, matches, players, teams,
preferences , etc ...) and the inability to access the application
features with the credentials of the User Profile just deleted.
L.6: Login without an account
This feature is only available on the mobile application.
From the Login screen, which is the first screen that appears the first time you use the application, click on "Login without account". The user who accesses the application through this mode does not create a User Profile. The application features available to this type of user will be the same but with some limitations that the user without an account must take into account:
The user without an account will not be able to access the following features of the Account Preferences:
change of username;
password reset;
cancellation of the User Profile.
The user without an account will not be able to make other users editor of his championships nor will he be able to receive requests to share the championships of other users.
If the application is uninstalled, the user without an account will permanently lose access to all data and content generated without having logged in with a User Profile.
If the application is installed on a new device, the user without an account will not be able to provide access credentials that allow him to access and modify the contents previously generated.
L.7: Trial period and purchase of the Use License
The licensing features and regulations described below are valid only for the use of the "A. Championship & Tournament Desktop”. The full exploitation of the functions on a mobile application (Android) is exempt from these constraints.
The use of the "A. Championship & Tournament Desktop "is bound by the creation of a User Profile and, in the event of the expiry of the Trial Period, by the purchase of a Use License linked to it. The following conditions apply:
Trial Period: the user can access the features of "A. Championship & Tournament Desktop ”for free if the Trial Period is still valid. It extends for 20 days following the creation of the User Profile.
Purchase of the Use License: at the end of the Trial Period, in order to continue to take advantage of the software features, the user is required to purchase a Use License associated with his User Profile. The purchase of the Use License is NOT automatic and is NOT binding for the user who has already agreed to use the software during the Trial Period. However, he is bound to proceed with the purchase if he wishes to continue enjoying the features used up to that time free of charge. Payment can be made by clicking directly on the link indicated in the application. At the end of the payment, the user will receive a confirmation message to the email address associated with the User Profile. From that moment on, a validated Use License will be associated with the User Profile for which the payment was made.
Duration and cost of the Use License: the cost of the Use License will be clearly shown both at the time of payment and in the notifications indicating the remaining Trial Period days that the user can find on the Home screen. The duration of the Use License is 1 year.
Expiration of the Use License: when the Use License runs out (ie 12 months after purchase), the user will be required to purchase a new Use License for his User Profile in order to continue to enjoy the features of the software. The renewal of the purchase is NOT automatic, therefore the payment must be made consciously and voluntarily by the user following the same procedure used for the purchase of the first Use License.
Section 0: Tournament management
0.1: Tournament list
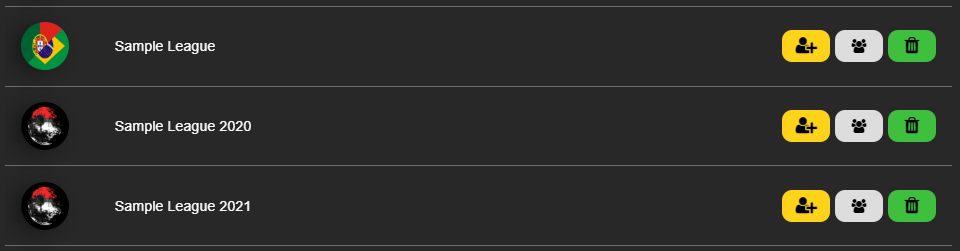
From the Home screen, which is the first screen that appears after accessing the application, press the "Your Championships" button. Here are listed all the leagues created by the user or the leagues of other users for which the user has the role of Editor. By pressing on each of them, the user accesses the Championship screen from which all the components of the tournament are managed (teams, matches, players, statistics, etc.).
The following elements may be present on each line of the list:
 Sharing
symbol: it is present only on tournaments of which the user is
not the Owner but of which he is the Editor. The row of the shared
championship is lighter in color and some actions such as canceling
and sharing the tournament are not available. However, the "Leave"
button is available for abandoning the role of Championship Editor
losing access and editing privileges.
Sharing
symbol: it is present only on tournaments of which the user is
not the Owner but of which he is the Editor. The row of the shared
championship is lighter in color and some actions such as canceling
and sharing the tournament are not available. However, the "Leave"
button is available for abandoning the role of Championship Editor
losing access and editing privileges. Championship
Image: The championship image uploaded during creation or from
the Championship Options.
Championship
Image: The championship image uploaded during creation or from
the Championship Options. Published
icon: it is present only when the tournaments is published
online by its owner (or one of its editors) (Paragraph 3.5).
Clicking on it lead the user to the tournament public web page.
Anyone who searches it can access
this page an view (but not edit) the standings, the top scorers
ranking and the matches.
Published
icon: it is present only when the tournaments is published
online by its owner (or one of its editors) (Paragraph 3.5).
Clicking on it lead the user to the tournament public web page.
Anyone who searches it can access
this page an view (but not edit) the standings, the top scorers
ranking and the matches.Tournament name: in the case of a tournament for which you are Editor, the username of the Owner user is added to it.
 "Add
Editor" button: triggers access to a search screen that
allows you to formulate a sharing request to a user among the
registered User Profiles. The user who receives the invitation can
accept or decline it. If accepted, it becomes the Championship
Editor who obtains the same privileges as the Owner on all
tournament actions, except for the cancellation of the tournament
and the invitation of other users.
"Add
Editor" button: triggers access to a search screen that
allows you to formulate a sharing request to a user among the
registered User Profiles. The user who receives the invitation can
accept or decline it. If accepted, it becomes the Championship
Editor who obtains the same privileges as the Owner on all
tournament actions, except for the cancellation of the tournament
and the invitation of other users.“Show Editors” button ( Paragrafo 0.3).
 “Leave”
button: this button is visible only on tournaments for which the
user is the Editor. It triggers the removal of the user from the
Tournament Editor role, which results in the user losing all access,
action and modification privileges of the selected tournament.
However, the Owner user can make a new sharing request to the Editor
user who has abandoned the tournament, and he can accept it again to
regain possession of the tournament access, action and modification
privileges.
“Leave”
button: this button is visible only on tournaments for which the
user is the Editor. It triggers the removal of the user from the
Tournament Editor role, which results in the user losing all access,
action and modification privileges of the selected tournament.
However, the Owner user can make a new sharing request to the Editor
user who has abandoned the tournament, and he can accept it again to
regain possession of the tournament access, action and modification
privileges. "Delete
championship" button: triggers the cancellation of the
tournament. This button is only available for the tournament owner
user. In case of confirmation by the user, the tournament and all
the data contained therein (teams, players, matches, statistics,
etc.) are permanently removed from the system and it will no longer
be possible for any user to access it again.
"Delete
championship" button: triggers the cancellation of the
tournament. This button is only available for the tournament owner
user. In case of confirmation by the user, the tournament and all
the data contained therein (teams, players, matches, statistics,
etc.) are permanently removed from the system and it will no longer
be possible for any user to access it again.
0.2: Adding a user as a championship editor
![]()
 The
"Add
Editor"
button defined in Paragraph 0.1 triggers access to the User Profile
search screen that the Owner user intends to invite to become the
Editor of his tournament. To search for the user to whom to send the
sharing request, it is necessary to enter the username or part of it
in the search bar and then press on the magnifying glass. From the
list of users resulting from the search, the Owner must select the
user he wishes to invite. The latter then receives a sharing request
notification that he can accept or decline. If accepted, the user
becomes the Championship Editor and will then be enabled to access,
action and modify most of the tournament content. Each
tournament can have up to 10 editors.
The
"Add
Editor"
button defined in Paragraph 0.1 triggers access to the User Profile
search screen that the Owner user intends to invite to become the
Editor of his tournament. To search for the user to whom to send the
sharing request, it is necessary to enter the username or part of it
in the search bar and then press on the magnifying glass. From the
list of users resulting from the search, the Owner must select the
user he wishes to invite. The latter then receives a sharing request
notification that he can accept or decline. If accepted, the user
becomes the Championship Editor and will then be enabled to access,
action and modify most of the tournament content. Each
tournament can have up to 10 editors.
0.3: Viewing and removing editors
![]() The
"Show
Editors"
button defined in Paragraph 0.1 triggers the opening of a panel which
shows the list of the tournament editors. From this screen, the Owner
also has the possibility to remove the Editors from the tournament
and to see the User Profiles in the list whose sharing request has
not yet been accepted or declined. Tournament editors can be at most
10.
The
"Show
Editors"
button defined in Paragraph 0.1 triggers the opening of a panel which
shows the list of the tournament editors. From this screen, the Owner
also has the possibility to remove the Editors from the tournament
and to see the User Profiles in the list whose sharing request has
not yet been accepted or declined. Tournament editors can be at most
10.
0.4: Share Request Notification
![]() On
the header of the Home screen, which is the first screen that appears
after accessing the application, a bell is visible which represents
the notifications of the
received sharing
requests. The bell is normally colored gray, but turns yellow when
there are one or more sharing requests, addressed to the user, still
unanswered. By pressing on the bell the
user
can access the Tournament Sharing Requests screen. For each request
received, the user can:
On
the header of the Home screen, which is the first screen that appears
after accessing the application, a bell is visible which represents
the notifications of the
received sharing
requests. The bell is normally colored gray, but turns yellow when
there are one or more sharing requests, addressed to the user, still
unanswered. By pressing on the bell the
user
can access the Tournament Sharing Requests screen. For each request
received, the user can:
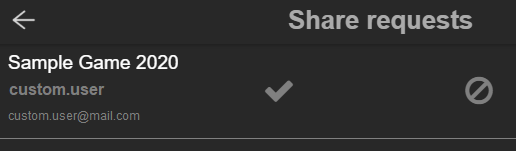 Accept
the sharing request and then become the Championship Editor. The
Championship Editor has all the privileges of access, action and
modification of the related tournament except for:
Accept
the sharing request and then become the Championship Editor. The
Championship Editor has all the privileges of access, action and
modification of the related tournament except for:cancellation of the aforementioned tournament;
the formulation of further requests for sharing the aforementioned tournament to other users.
Reject the sharing request and then cancel the notification.
Section 1: Tournament creation
1.1: General informations
![]() From
the Home screen, which is the first screen that appears after
accessing the application, press the "Create
new championship"
button. This triggers access to the Championship Creation screen. In
this screen, the following actions will be possible:
From
the Home screen, which is the first screen that appears after
accessing the application, press the "Create
new championship"
button. This triggers access to the Championship Creation screen. In
this screen, the following actions will be possible:
 Enter
the name of the tournament.
Enter
the name of the tournament. Selection
or upload of the tournament image.
The "Select
Image:"
selection button triggers the opening of a panel from which the user
can select the representative image of the tournament. The
user
can choose a sample image provided by default by the software or, by
pressing the appropriate Upload button, upload an image file from
his device.
Selection
or upload of the tournament image.
The "Select
Image:"
selection button triggers the opening of a panel from which the user
can select the representative image of the tournament. The
user
can choose a sample image provided by default by the software or, by
pressing the appropriate Upload button, upload an image file from
his device. Setting
the "Provide
strength
score"
option. If enabled, this setting allows the insertion of the attack
and defense scores of each team. If disabled these scores are
ignored.
Setting
the "Provide
strength
score"
option. If enabled, this setting allows the insertion of the attack
and defense scores of each team. If disabled these scores are
ignored.Adding a team (Paragraph 1.2).
Copy of one or more teams (Paragraph 1.3) including the players of the team.
Cloning of a championship (Paragraph 1.4) including the players of the its teams.
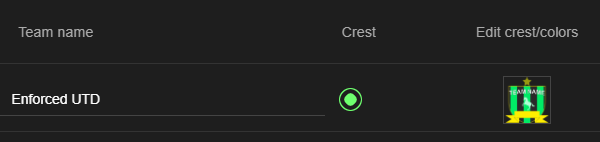
For each team:
entering the team name (maximum 21 characters);
switch from club colors to club crest (Section 7);
selection of the two club colors of the team if “Crest” is deselected (Paragraph 1.5);
creation of the crest of the team if “Crest” is selected (Section 7);
setting, if required, of the strength scores (attack and defense) (Paragraph 1.6);
removal of the team from the list.
Completion of the Creation of the Championship through the button "Create" which triggers the generation of all the initial data of the tournament including standard settings, initial standings, teams and players. Until the user performs this action, the data entered in the Championship Creation screen are provisional and therefore subject to permanent cancellation in case of abandoning the screen, closing the software or switching off the device.
The following restrictions apply:
The software, at present, only makes available the creation of round-robin tournaments (Knock-out will be available further).
The number of participating teams is irreversible once the tournament creation is complete.
The maximum number of participating teams allowed is 26.
1.2: Adding a new team
 The
“Add
team”
button triggers the creation of a new team slot in the list of teams
to be created in the Championship Creation screen. The inserted slot
is devoid of information which will be specifically valued by the
user. This information consists of:
The
“Add
team”
button triggers the creation of a new team slot in the list of teams
to be created in the Championship Creation screen. The inserted slot
is devoid of information which will be specifically valued by the
user. This information consists of:
team name (mandatory, maximum 21 characters);
club colors or club crest;
if required, attack and defense strength score.
These data are stored in volatile memory, and therefore subject to permanent cancellation, until the user completes the creation of the Championship by saving it.
1.3: Copying teams
 The
"Copy
Team .."
button
triggers the opening of a selection panel that lists all the teams
created by the user in other tournaments of the same User Profile.
From here the user can select the teams he wants to copy. The
selection triggers the creation of a new team slot in the list of
teams to be created in the Championship Creation screen. The inserted
slot will already be populated with the copied team information,
although they can still be modified by the user. When the user
confirms the saving and the creation of the Championship, the players
of the copied teams are also generated.
The
"Copy
Team .."
button
triggers the opening of a selection panel that lists all the teams
created by the user in other tournaments of the same User Profile.
From here the user can select the teams he wants to copy. The
selection triggers the creation of a new team slot in the list of
teams to be created in the Championship Creation screen. The inserted
slot will already be populated with the copied team information,
although they can still be modified by the user. When the user
confirms the saving and the creation of the Championship, the players
of the copied teams are also generated.
![]()
1.4: Cloning tournaments
 The
"Clone
championship .."
button
triggers the opening of a selection panel that lists all the
tournaments created by the user. From here the user can select the
tournament he intends to clone. Tournament selection automatically
triggers:
The
"Clone
championship .."
button
triggers the opening of a selection panel that lists all the
tournaments created by the user. From here the user can select the
tournament he intends to clone. Tournament selection automatically
triggers:
setting the image of the new tournament by copying it from the selected tournament;
a copy of all the teams of the selected tournament, including name, club colors, crest, strength scores and players;
setting the "Provide strength score" option by copying it from the selected tournament.
When the user confirms the saving and creation of the Championship, the players of the teams copied through the cloning of the championship are also generated.
1.5: Setting the club colors of the teams
![]()
For
each team it is possible to set the two club
colors through the appropriate square next to the space for the name.
By pressing on the respective colored squares (initially black), the
user accesses the color selection screen which can be selected
through the infinite RGB palette made available. These colors will
then be editable in the Team Management screen (Paragraph 4.4). The
club colors will be displayed next to the team name in both tables
and matches. They can be hidden by disabling the respective setting
in the Championship Settings panel (Paragraph 3.1). It
is possible to hide the team colors and show the club crest at their
place checking the “Crest”
checkbox (Section 7).
1.6: Setting the strength scores of the teams
![]() For
each team you can set the attack strength score and the defense
strength score. These scores will be used as parameters by the system
algorithm to calculate the result of the matches
in which the user chooses to randomly generate the score (Paragraph
5.2).
For
each team you can set the attack strength score and the defense
strength score. These scores will be used as parameters by the system
algorithm to calculate the result of the matches
in which the user chooses to randomly generate the score (Paragraph
5.2).
It is possible to change these parameters in the Team Management screen (Paragraph 4.4). These parameters can be hidden by disabling the respective setting in the Championship Settings panel (Paragraph 3.1).
Section 2: Championship management
From the list of championships screen (Paragraph 0.1) the user can press on the row of the championship whose data, actions and modifications are to be accessed. The Championship Management main screen consists of the following elements:

 Tabset
of the main information of the championship, composed in turn of:
Tabset
of the main information of the championship, composed in turn of:team standings tab (Paragraph 2.2.);
team top scorers tab (Paragraph 2.3);
matches tab (Paragraph 2.4).
Name and image of the championship in the header.
 Side
pop-up menu containing championship options (Paragraph
3).
Side
pop-up menu containing championship options (Paragraph
3).Tournament "Refresh" button.
2.1: Scores refresh
![]() Users
who have access to the tournament, ie the Owner and the Editors
invited by the Owner himself, can access the tournament data, actions
and modifications even at the same time from different devices. The
modification of the tournament data, therefore, could (in
certain situations of inactivity)
not be propagated in real time to all connected users. The "Refresh"
button triggers an update of all tournament data on the interface
keeping all users informed of the new changes. For example: with the
"Refresh"
button the Owner user can force the instant update of all the data of
the championship and can therefore observe in real time the changes
in the standings
caused by the modification of a match
score by an Editor .
Users
who have access to the tournament, ie the Owner and the Editors
invited by the Owner himself, can access the tournament data, actions
and modifications even at the same time from different devices. The
modification of the tournament data, therefore, could (in
certain situations of inactivity)
not be propagated in real time to all connected users. The "Refresh"
button triggers an update of all tournament data on the interface
keeping all users informed of the new changes. For example: with the
"Refresh"
button the Owner user can force the instant update of all the data of
the championship and can therefore observe in real time the changes
in the standings
caused by the modification of a match
score by an Editor .
2.2: Standings
The first tab of the tabset of the Championship Management screen displays the standings. The standings informations (points, goals, matches) are automatically calculated by the software when the scores of the matches played (Paragraph 5.1) or some settings change. The standings display the following information in descending order based on the team score:
Position in the standings.
Name of the team and club colors or the club crest. The club colors can be hidden by disabling the respective setting (Paragraph 3.1).
The matches played by the team, ie the team matches marked as “Match Played” from the Matches screen.
The team points. The points are made up of the sum of the points obtained for each match played. The points awarded for each match (played) are based on the following criteria:
0 points awarded in case of defeat;
1 point awarded in case of a tie;
in case of victory, the amount of points awarded can be changed from the Championship Settings (Paragraph 3.1). By default it corresponds to 3.
Sum of goals / points scored in the played matches.
Sum of goals / points conceded in the played matches.
Goal / points difference calculated on the basis of the played matches (subtraction of goals / points conceded to goals / points scored).

Pressing
on the team line leads to the Team Management screen (Section 4)
where, among other things, it is also possible to observe the sums of
the
won,
lost
and drawn
(played)
matches
.
2.3: Top scorers
The second tab of the tabset of the Championship Management screen displays the scorer ranking. The information of the ranking (the goals or points scored by the player) is calculated automatically by the software when the goals / points scored by the scorers, in the played matches, change (Paragraph 5.3) or when the players are deleted. The ranking displays the following information, in descending order based on the goals / points scored by the scorer:
Position in the ranking.
Player name.
Role of the player.
Name and colors or crest of the player's team. The club colors can be hidden by disabling the respective setting (Paragraph 3.1).
Sum of goals / points scored by the player.

By pressing on the player line, the user accesses a panel that displays the player informations configured in the player edit panel (Paragraph 4.5).
2.4: Matches
The third tab of the tabset of the Championship Management screen displays the list of matches divided by round (or matchday). The number of rounds is automatically calculated by the software based on the number of matches that can be played in a round. The number of matches of a round is calculated on the basis of the following formula: number of teams participating in the tournament divided by two.
Pressing on the match line takes the user the Match Management screen (Section 5).

From
this list view the user can perform a series of actions for each
match.
The actions are described in the following paragraphs.
2.4.1: Played / not played match
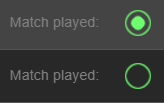 Enabling
or disabling the “Match Played” checkbox on
the match line indicates whether the match has been played or is
still to be played. If the match is played, then the green dot is
filled, the match score is automatically processed to update the
following data:
Enabling
or disabling the “Match Played” checkbox on
the match line indicates whether the match has been played or is
still to be played. If the match is played, then the green dot is
filled, the match score is automatically processed to update the
following data:
the matches played, the points, the goals / points scored, the goals / points conceded and the goal / points difference of the teams in the standings, which are rearranged (Paragraph 2.2);
the goals / points scored by the players in the top scorers, which is rearranged (Paragraph 2.3);
the goals / points scored by the players in the list of team players (Paragraph 4.5);
team statistics visible in the Team Management screen (Paragraph 4.1);
the list of team matches placed in the Team Management screen (Paragraph 4.1);
the team statistics graphs (Paragraph 4.3).
2.4.2: Matches options
 The
user can open the Match Settings menu in the following ways:
The
user can open the Match Settings menu in the following ways:
if using “A. Championsthip & Tournament” mobile version: holding down with the finger on the match concerned until the menu appears at the top;
if using “A. Championship & Tournament Desktop”: pressing the right mouse button on the match concerned.
Once the Matches Settings menu is open, the user can select other matches (or deselect them) by simply pressing on the respective line in the list. The selected matches are willing to undergo the actions provided by the Settings menu. When a match is selected, its row in the list turn green. The unselected matches remain colored in the ordinary standard gray.
The menu can be closed in three ways:
![]() • pressing on the “X” on the right of the
menu;
• pressing on the “X” on the right of the
menu;
• confirming the setting of the date(s) of the selected matches;
• removing the date(s) of the selected matches;
• deselecting all the selected matches.
When the menu is closed, all matches are deselected and it is no longer possible to select them until the menu is reopened.
In summary: the action of pressing (with the left mouse button in the case of the Desktop application) on the match line can trigger two events:
opening the Match Management screen if the Match Settings menu is closed;
select or unselect the match if the Match Settings menu is open.
Match Settings allow the user to perform the following operations on selected matches:
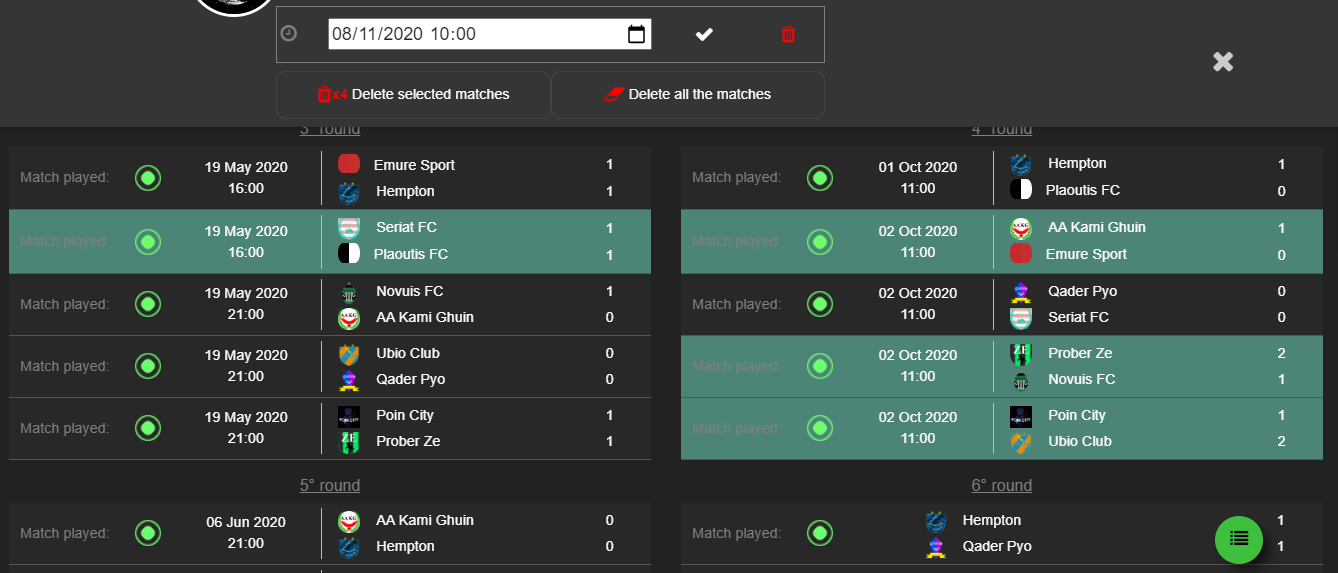
Setting the date of the match(es): in the top section of the Settings menu there is a small calendar from which the user can select the date and time of the selected matches. Setting the date is confirmed by pressing the check mark on the right of the calendar. This also triggers the closing of the menu.


Removal of the date of the match(es): vice versa, it is possible to remove the playing date of the selected matches by pressing the "X" on the left of the calendar. This action also triggers the closing of the menu. Deleting
the selected matches:
by pressing the "Delete
selected matches"
button, all the selected matches are permanently deleted. This
operation is followed by the recalculation of the match days, and,
in the event that matches
played
have been canceled, the rankings and the goals scored by the
players.
Deleting
the selected matches:
by pressing the "Delete
selected matches"
button, all the selected matches are permanently deleted. This
operation is followed by the recalculation of the match days, and,
in the event that matches
played
have been canceled, the rankings and the goals scored by the
players. Elimination
of all matches in the tournament:
by pressing the "Delete
all the matches"
button, all matches in the tournament are permanently deleted. This
operation is followed by the recalculation of the standings
and the goals scored by the players, if some
played
match
has
been canceled, bringing all the counters to zero.
Elimination
of all matches in the tournament:
by pressing the "Delete
all the matches"
button, all matches in the tournament are permanently deleted. This
operation is followed by the recalculation of the standings
and the goals scored by the players, if some
played
match
has
been canceled, bringing all the counters to zero.
 2.4.3:
Round summary
2.4.3:
Round summary
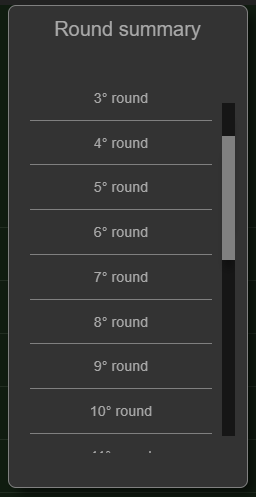
 Pressing
the green circular summary button, at the bottom right of the match
tab, triggers the opening of the summary panel of the rounds.
This panel lists all the rounds
of the tournament. By pressing on the match day you want to search,
the screen automatically scrolls the list of matches until the match
day is visible in the foreground. This summary makes it easier for
the user to switch from one round
to another in the event that the championship consists of a very
large number of rounds.
Pressing
the green circular summary button, at the bottom right of the match
tab, triggers the opening of the summary panel of the rounds.
This panel lists all the rounds
of the tournament. By pressing on the match day you want to search,
the screen automatically scrolls the list of matches until the match
day is visible in the foreground. This summary makes it easier for
the user to switch from one round
to another in the event that the championship consists of a very
large number of rounds.
2.5: Social sharing
This feature is only available on “A. Chamionship & Tournament” mobile application.
In the first tab of the tabset of the Championship Management screen there is a round green button for Social sharing at the bottom right. By clicking on the button, the possible sharing options are extended. Carrying out a Social sharing consists in the software generating a screenshot of the standings, and the consequent creation of a message or post on Social ready to be published. The social networks on which the user can publish the ranking of their tournament are:
WhatsApp, through a message to be sent to the desired contact (s);
Facebook;
Instagram;
Twitter.
In order for the sharing operation to be carried out, the user must have the respective social application installed on his device.
Section 3: Championship options
![]() To
access the Championship Options, the user has to press on the three
horizontal bars located at the top right on the header of the
Championship Management screen. This operation triggers the
appearance, on the right, of the menu containing the Championship
Options. From this menu the user can perform the following
operations:
To
access the Championship Options, the user has to press on the three
horizontal bars located at the top right on the header of the
Championship Management screen. This operation triggers the
appearance, on the right, of the menu containing the Championship
Options. From this menu the user can perform the following
operations:
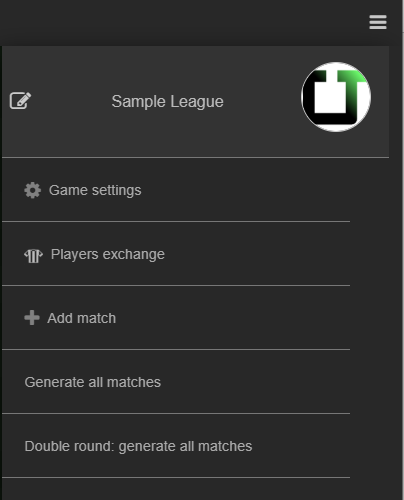 Change
the name of the championship. Pressing the edit button (the
pencil) enables the tournament name to be changed. Here the user can
enter the new name and confirm or cancel the change.
Change
the name of the championship. Pressing the edit button (the
pencil) enables the tournament name to be changed. Here the user can
enter the new name and confirm or cancel the change.Change (by selecting or uploading) the tournament image by clicking on the tournament image to the right of the tournament name. This action triggers the opening of a panel from which the user can select the representative image of the tournament. He can choose a sample image provided by default by the software or (by pressing the appropriate Upload button) upload an image file from his device.
Access the Championship Settings (Paragraph 3.1).
Access the Player Exchange screen (Paragraph 3.2).
Manually add a match by selecting its home and away team (Paragraph 3.3).
Draw up the tournament calendar by automatically generating all the matches so that all teams meet each other (one way) (Paragraph 3.4).
Draw up the tournament calendar by automatically generating all matches so that all teams meet each other twice, once at home and once away from home (round-robin round trip) (Paragraph 3.4).
Publish online the tournament or unpublish it if already published (Paragraph 3.5). Once published, the tournament standings, top scorers and matches can be viewed by everyone in the web, although they will not be able to edit them.
3.1: Championship settings
![]() By
selecting the “Game Settings” item in the
Championship Options menu, the user accesses the Championship
Settings panel. From here he can configure the following settings:
By
selecting the “Game Settings” item in the
Championship Options menu, the user accesses the Championship
Settings panel. From here he can configure the following settings:
Points to win: tells the system how many points to assign to a team in case of victory for each match played. By default it is 3.

Type of table: indicates to the system how to calculate the position in the standings (Paragraph 2.2) of two or more teams with the same amount of points. The possible options are:“Goal Difference”: the teams with the same number of points are sorted among themselves in descending order based on the resulting goal / point difference of the played matches.
"Head to Head": the teams with the same number of points are sorted among themselves according to the head to head matches. A team is placed before the other if, in the sum of the points collected in the matches played between them, it has an active score or, in the case of an even score, has scored a greater number of goals / points away from home.
In the event of an absolute tie, also determined by the factors described above, the teams with the same number of points are ordered among themselves based on the goals scored in the matches played. In case of further parity, the sorting is done randomly.


“Show Club Colors”: shows or hides the club colors of the teams on the various screens. This change will not infect the viewing of the clubs’ crest.“Team strength score”: shows or hides the configuration of the strength scores (attack and defense) of the teams from the Team Management screen (Section 4.4).

"Random score multiplier": multiplier factor of the score generated by the random score of the match (Paragraph 5.2). In Match Management it is possible to have the system generate a semi-random score based on the strength scores assigned to the teams. This multiplier tells the system the amount of goals / points that teams generally score in this type of tournament or sport. For example: if you want matches to end up more like a 7-5 or 9-2 rather than a 1-0 or 2-1 then you need to increase this factor to 4. By default it is set to 1.
![]()
To
make the changes to the settings persistent, the “SAVE
SETTINGS”
button has
to be pressed.
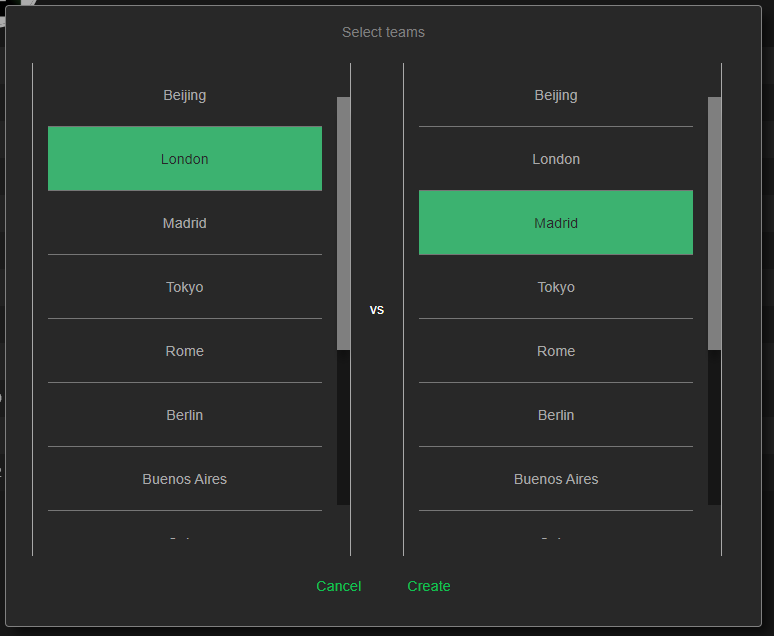
3.2: Exchange of players
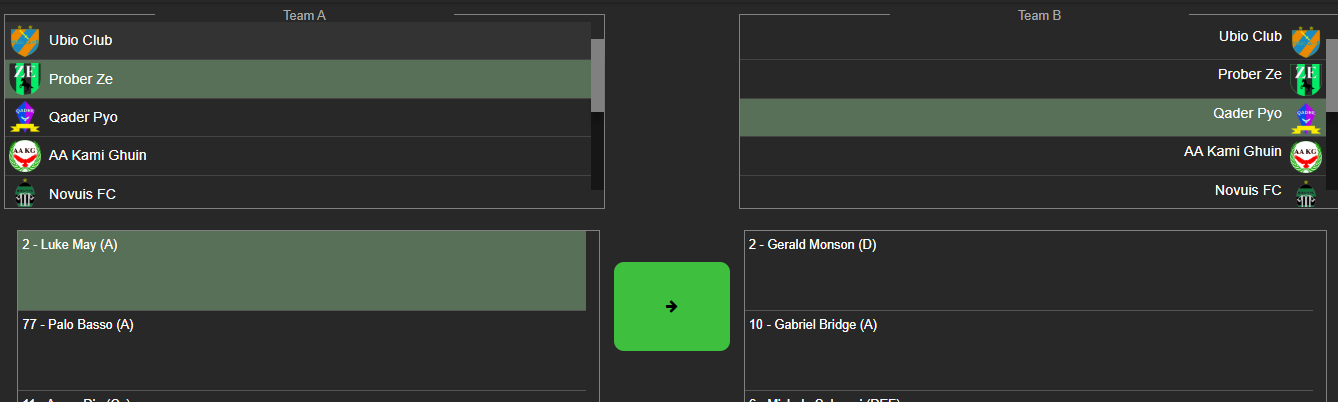
![]() Selecting
the item “Players
exchange”
in the Championship Options menu the
user
accesses
the Player Exchange screen. Here the user can select the two teams
between which he intends to swap players. The selection of the teams
triggers the population of the respective player lists. From these
lists the
user
must select the player(s) to trade. Once the player has been
selected, the user must press on the respective arrow to move him
to the list of players of the other team. This move automatically
triggers the updating of the scorer ranking, the list of players in
the Team Management and the list of players of the teams in the Match
Management.
Selecting
the item “Players
exchange”
in the Championship Options menu the
user
accesses
the Player Exchange screen. Here the user can select the two teams
between which he intends to swap players. The selection of the teams
triggers the population of the respective player lists. From these
lists the
user
must select the player(s) to trade. Once the player has been
selected, the user must press on the respective arrow to move him
to the list of players of the other team. This move automatically
triggers the updating of the scorer ranking, the list of players in
the Team Management and the list of players of the teams in the Match
Management.
 3.3:
Manually adding matches
3.3:
Manually adding matches
![]() Selecting
the “Add
Match”
item from the Championship Options menu the
user
can access the match creation panel. Here the
user
can select the home team and the away team. Once selected, he
has to click
on "Create"
to proceed with the creation of the match.
The
new match
is automatically added as the last match (among the matches existing
at that moment) of the tournament.
Selecting
the “Add
Match”
item from the Championship Options menu the
user
can access the match creation panel. Here the
user
can select the home team and the away team. Once selected, he
has to click
on "Create"
to proceed with the creation of the match.
The
new match
is automatically added as the last match (among the matches existing
at that moment) of the tournament.
3.4: Automatic match generation
Matches on the calendar can be automatically generated by the software by making sure that all teams meet each other once during the tournament. The generation of the matches by the system takes place using the Berger Algorithm. This automatic generation can be done in two ways:
Selecting the “Generate all matches” item in the Championship Options menu triggers the automatic generation of all matches so that all teams meet each other (first round only).
Selecting "Double round: generate all matches" from the Championship Options menu triggers the automatic generation of all matches so that all teams meet each other twice, once at home and once away from home ( first round and second round). All second matches are generated to be subsequent to the first round matches and in the same order as the first round matches, but reversing the home team with the away team.
3.5: Publish tournament

 Selecting
the “Publish”
item from the Championship Options menu, the user can publish their
tournament on a A. Championship & Tournament website page, so
that anyone
would be able to view its
standings, top scorers ranking and matches scores. The user can
choose to use this option to keep their followers or their audience
updated on the ongoing of the champioship. The user can undo this
operation by clicking on the “Unpublish”
item that appears in place of the “Publish”
item when the tournament is online.
Selecting
the “Publish”
item from the Championship Options menu, the user can publish their
tournament on a A. Championship & Tournament website page, so
that anyone
would be able to view its
standings, top scorers ranking and matches scores. The user can
choose to use this option to keep their followers or their audience
updated on the ongoing of the champioship. The user can undo this
operation by clicking on the “Unpublish”
item that appears in place of the “Publish”
item when the tournament is online.
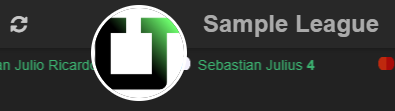
![]() When
the tournament is published, the publish icon turns yellow and the
same symbol is visible at the left of the tournament name both in the
Championship top header bar and the Load Championship screen. By
clicking on this icon the software opens the default browser to lead
the user to the tournament related page on the website. The user
views the public page of their tournament at the same way everyone
will view it. Once the user unpublishes the tournament, it will be no
more visible.
When
the tournament is published, the publish icon turns yellow and the
same symbol is visible at the left of the tournament name both in the
Championship top header bar and the Load Championship screen. By
clicking on this icon the software opens the default browser to lead
the user to the tournament related page on the website. The user
views the public page of their tournament at the same way everyone
will view it. Once the user unpublishes the tournament, it will be no
more visible.
Anyone can navigate at service.championshiptournament.com/web/tournaments to search the tournament he want to view between all the published tournaments of all the registered users.
Section 4: Team management
 Pressing
on the row of the team in the standings
table
(Paragraph 2.2) the
user
accesses
the Team Management screen. This screen contains the following
information:
Pressing
on the row of the team in the standings
table
(Paragraph 2.2) the
user
accesses
the Team Management screen. This screen contains the following
information:
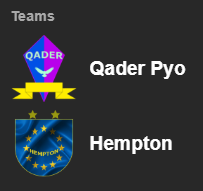
team name, colors and crest;
team statistics;
matches of the team;
team players;
team statistics graphs.
and the following items:
checkbox to switch from club colors to club crest;
field to edit the club crest;
field to change the club colors of the team;
field to change the team name;
field to change the team's strength scores;
field to access the team players panel;
field to access the team statistics graphs.
4.1: Viewing team stats
From the Team Management screen it is possible to observe two sections of statistics: the sums of match played / won / drawn / lost accompanied by the sums of the various goals / points scored / suffered, and the list of matches played and to be played in the tournament where the team in question is engaged. The team stats contain the following information:

“Played”: the amount of matches played by the team, ie the team's matches marked as “Match Played” from the Matches screen.“Points”: the team's points. The points are made up of the sum of the points obtained for each match played. The points awarded for each match (played) are based on the following criteria:
0 points awarded in case of defeat;
1 point awarded in case of a tie;
in case of victory, the amount of points awarded can be changed from the Championship Settings (Paragraph 3.1). By default it corresponds to 3 points.
“Won”: the amount of matches played and won by the team.
“Drawn”: the amount of matches played and drawn by the team.
“Lost”: the amount of matches played and lost by the team.
“GF”: sum of goals / points scored in the matches played by the team.
“GA”: sum of goals / points conceded in the matches played by the team.
“GD”: goal / point difference calculated on the basis of the matches played by the team (subtraction of the goals / points conceded to the goals / points scored).
The list of matches shows in sequence all the matches played and to be played by the team in the tournament, indicating the name of the teams and the result (0-0 by default). Match lines can be colored in different ways based on certain conditions:

standard gray, if the match was not played by the team;
green, if the match was played and won by the team;
light gray, if the match was played and tied by the team;
bordeaux, if the match was played and lost by the team.
4.2: Viewing team statistics graphs
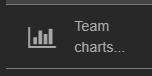

Selecting
the item “Team
charts ...”,
from the options menu of the Team Management screen, the
user
can access the team statistics graph screen. Each section of the page
containing one of the graphs can be collapsed or extended by pressing
the arrow at the top left of the section. The graphs that the user
can observe are the following:
Doughnut that represents in proportion, also indicating the number, the matches (played) won, drawn and lost. The colors used to represent the data are random.
Bar chart of goals / points scored by team players. If no goal / point has been scored by any player, the graph is not visible.
Cartesian graph of team points. The rounds are represented on the x-axis, while the team's points in the respective round are represented on the y-axis.
Cartesian graph of the goals / points difference. The rounds are represented on the x-axis, while the goal / points difference (goals / points scored minus goals / points conceded) of the team at the time of the respective match day are represented on the y-axis. This graph helps the user to understand the team's performance trends during the tournament by highlighting phases of decline and growth.
Doughnut that represents the number of goals / points scored in the matches played by the team in proportion, also indicating the number. The graph represents:
how many times no goal / point has been scored during the match;
how many times has 1 goal / point been scored during the match;
how many times have 2 goals / points been scored during the match;
how many times have 3 goals / points been scored during the match;
how many times have 4 or more goals / points been scored in the match.
4.3: Edit team parameters
In the Team Management screen it is possible to modify the following parameters:
Team name: pressing on the pencil to the left of the team name enables the name change. Once the modification has been completed, press the check mark to confirm it, or the cross to cancel it.
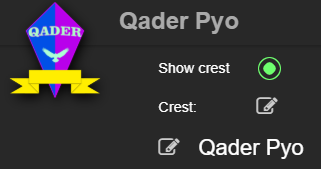
Show crest: by checking this checkbox, the user chooses to hide the club colors and show the club crest. To invert this operation the user must uncheck it.
 Club
crest: by pressing on the
edit button, rapresented by a pencil on the right of the “Crest:”
field, the user is led to the Club Crest Creator Panel on which they
can edit the crest, if it was not deleted previously (Section
7).
Club
crest: by pressing on the
edit button, rapresented by a pencil on the right of the “Crest:”
field, the user is led to the Club Crest Creator Panel on which they
can edit the crest, if it was not deleted previously (Section
7).
 Club
team colors:
by pressing on the respective colored squares, the user accesses the
color selection screen that can be selected through the infinite RGB
palette made available, and then confirmed by pressing the checkbox
or canceling
by pressing the cross. These club colors will be displayed alongside
the team name in both leaderboards and matches. This option is
hidden if its setting is disabled in the Championship Settings panel
(Paragraph 3.1).
Club
team colors:
by pressing on the respective colored squares, the user accesses the
color selection screen that can be selected through the infinite RGB
palette made available, and then confirmed by pressing the checkbox
or canceling
by pressing the cross. These club colors will be displayed alongside
the team name in both leaderboards and matches. This option is
hidden if its setting is disabled in the Championship Settings panel
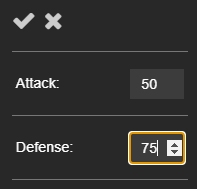
(Paragraph 3.1).Strength scores: by pressing on the appropriate pencil, the modification of the attack and defense strength score is enabled. Then the user must press on the tick to confirm the change or on the cross to cancel it. These scores will be used as parameters by the system algorithm to calculate the result of the matches in which the user chooses to randomly generate the score (Paragraph 5.2).
4.4: Adding and editing team players
 By
selecting the “Team
players ...”
item, from the options menu of the Team Management screen, the user
accesses the Team Players
Management panel, described in Section 6.
By
selecting the “Team
players ...”
item, from the options menu of the Team Management screen, the user
accesses the Team Players
Management panel, described in Section 6.
Section 5: Match management
![]() Pressing
on the match line in the matches list (Paragraph 2.4) the
user can
access the Match Management screen. This screen contains the
following information:
Pressing
on the match line in the matches list (Paragraph 2.4) the
user can
access the Match Management screen. This screen contains the
following information:
date of the match, if set from the match settings (Paragraph 2.4.2);
 name
of the two teams
flanked by the club
colors;
name
of the two teams
flanked by the club
colors;score of the teams;
scorers of the match;
and the following tools:
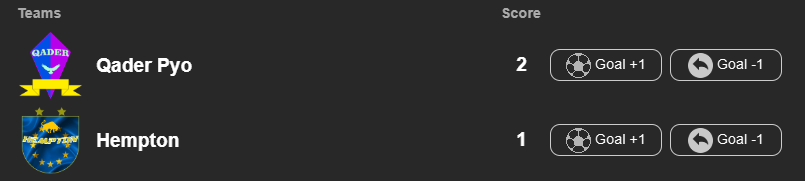
button, for each team, to increase the number of goals / points scored by the team by 1 (Paragraph 5.1);
button, for each team, to subtract a goal / point from the score of the team (Paragraph 5.1);
timer to keep the time of the match (Paragraph 5.5);
button to generate a random match score based on the strength parameters of the teams (Paragraph 5.2);
button to access the match scorers screen (Paragraph 5.3);
"SAVE MATCH" button to save the match score and the goals / points scored by the players (Paragraph 5.4).
5.1: Setting the match score
For both teams in the match it is possible, in the Match Management screen, to increase or reduce the number of goals / points scored by the team by 1. This operation is performed by pressing on the respective buttons located to the right of the team score (initially it is always equal to 0).
 The
score set by the user is not permanently recorded in the tournament
data until the user saves the match
by pressing the "SAVE
MATCH"
button. Saving triggers the processing of the score by the system in
order to calculate the outcome of the match (win / loss / draw) for
the teams, the standings, the statistics and so on (Paragraph 5.4).
The
score set by the user is not permanently recorded in the tournament
data until the user saves the match
by pressing the "SAVE
MATCH"
button. Saving triggers the processing of the score by the system in
order to calculate the outcome of the match (win / loss / draw) for
the teams, the standings, the statistics and so on (Paragraph 5.4).
5.2: Random generation of the match score
 By
selecting the item “Random
score”,
in the Match Management screen, the system is ordered to generate a
provisional random score. The score is calculated by an algorithm
that takes into account the attack and defense strength score of the
respective teams to generate a semi-random outcome. The algorithm
also takes into account a small advantage for the home team. Once the
random score has been processed, the score of the teams turns green
to indicate that that result is determined by the automatic
processing of the software and not by user input. This score is not
permanently recorded in the tournament data and can normally be
changed by the user by increasing or reducing the points / goals
assigned to each team through the buttons described in Paragraph 5.1.
By
selecting the item “Random
score”,
in the Match Management screen, the system is ordered to generate a
provisional random score. The score is calculated by an algorithm
that takes into account the attack and defense strength score of the
respective teams to generate a semi-random outcome. The algorithm
also takes into account a small advantage for the home team. Once the
random score has been processed, the score of the teams turns green
to indicate that that result is determined by the automatic
processing of the software and not by user input. This score is not
permanently recorded in the tournament data and can normally be
changed by the user by increasing or reducing the points / goals
assigned to each team through the buttons described in Paragraph 5.1.
This score is not saved until the user saves the match by pressing the "SAVE MATCH" button. Saving triggers the processing of the score by the system in order to calculate the outcome of the match (win / loss / draw) for the teams, the standings, the statistics and so on (Paragraph 5.4).
5.3: Setting the goals / points scored by the players of the match
 By
selecting the item "Scorers
...",
in the Match
Management screen, the user accesses the players
of the match
management screen. Here the players of the respective teams are
listed in two separate lists. The user can increase or reduce by
one the
goals / points scored by each player in the match using the "+"
and "-"
buttons placed
at
the right side
of the player's name. These scores are not saved until the user
returns to the Match
Management screen and saves the match
by pressing the "SAVE
MATCH"
button. Saving triggers the scoring of goals / points scored by
players in the team player lists and in the scorer table (Paragraph
5.4).
By
selecting the item "Scorers
...",
in the Match
Management screen, the user accesses the players
of the match
management screen. Here the players of the respective teams are
listed in two separate lists. The user can increase or reduce by
one the
goals / points scored by each player in the match using the "+"
and "-"
buttons placed
at
the right side
of the player's name. These scores are not saved until the user
returns to the Match
Management screen and saves the match
by pressing the "SAVE
MATCH"
button. Saving triggers the scoring of goals / points scored by
players in the team player lists and in the scorer table (Paragraph
5.4).


Going
over the team name with the mouse a popup
with the team’s
scorers of the match
is prompted. This feature
is available only on “A. Championship & Tournament
Desktop”.
5.4: Saving match
 Selecting
the "SAVE
MATCH"
item in the Match Management screen triggers the saving of all scores
provided by the user or generated automatically. Saving triggers the
processing of the score by the system in order to:
Selecting
the "SAVE
MATCH"
item in the Match Management screen triggers the saving of all scores
provided by the user or generated automatically. Saving triggers the
processing of the score by the system in order to:
display of the final result in the list of matches (Paragraph 2.4);
the outcome of the match (whether it is a win, a defeat or a draw) of both teams and the resulting visualization in the Team Management Screen (Paragraph 4.1);
the standings (Paragraph 2.2), whose points and goals / points scored and conceded are recalculated taking into account the new result of the match;
the statistics of each team, whose points, outcomes and goals / points scored and suffered are recalculated taking into account the new result of the match in question (Paragraph 4.1);
the goals / points scored by the players of both teams and the consequent visualization in the Player Management panel (Section 6);
the scorer ranking (Paragraph 2.3), whose goals / points scored are recalculated taking into account what is indicated in the management screen of the players of the match.
 5.5:
Using the timer
5.5:
Using the timer
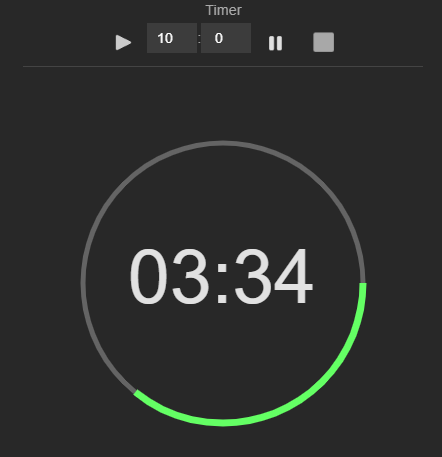
The match timer is available to the user in the Match Management screen. The timer counts down the time left at the end of the match. The total time of the match is set by the user. The following actions are possible:
Boxes for setting the minutes and seconds of the match duration.
“Play” button: once pressed, it starts the timer and the display of the remaining time shown in real time. In the event that the user leaves the Match Management screen, the timer continues in background to count the time. The minimization of the application does not cause it to stop. Closing the application, on the other hand, causes the running timer to stop and reset.
“Stop” button: once pressed, it stops the timer and returns the count to 0 minutes and 0 seconds.
“Pause” button: once pressed, it pauses the time count. The displayed time is the one remaining at the moment of the pause and is therefore not reset. The user can press the "play" button to restart the timer starting from the time remaining at the time of the pause. The timer continues to keep the time remaining in pause visible even if the user leaves the Match Management screen. The minimization of the application does not cause it to be reset. Closing the application, on the other hand, causes the reset of the paused timer.
When the remaining time expires, the timer stops and resets automatically. The end of time is reported to the user through a notification also containing the name of the two teams and the result.
Section 6: Players management
 By
selecting the “Team
players...”
item, from the options menu of the Team Management screen, the user
accesses the Team Player Management panel. The team players are
listed here. Each player's row contains the following elements:
By
selecting the “Team
players...”
item, from the options menu of the Team Management screen, the user
accesses the Team Player Management panel. The team players are
listed here. Each player's row contains the following elements:
edit button (represented by a pencil) that leads to the player edit panel (Paragraph 6.2);
player name, role (if provided) and player number (if provided);
number of goals / points scored in all matches played by the team to which he belongs;
deletion button (represented by a trash can) which triggers the permanent deletion of the player from the team and the tournament (Paragraph 6.3).
There are also two other buttons:
Button for adding a new player (represented by the “+” sign) (Paragraph 6.1).
 Player
sort
button
(down arrow on the goal / points scored column). By default, players
are listed alphabetically by name. By pressing on the arrow it is
possible to move to a descending order based on the goals / points
scored. By pressing the arrow again you can return to the
alphabetical order display.
Player
sort
button
(down arrow on the goal / points scored column). By default, players
are listed alphabetically by name. By pressing on the arrow it is
possible to move to a descending order based on the goals / points
scored. By pressing the arrow again you can return to the
alphabetical order display.
6.1: Creating new players of the team
![]() By
pressing the "+"
button to add a new player, located
in the Team Player Management panel, the user accesses the panel for
adding a new player. Here he can provide the following features:
By
pressing the "+"
button to add a new player, located
in the Team Player Management panel, the user accesses the panel for
adding a new player. Here he can provide the following features:
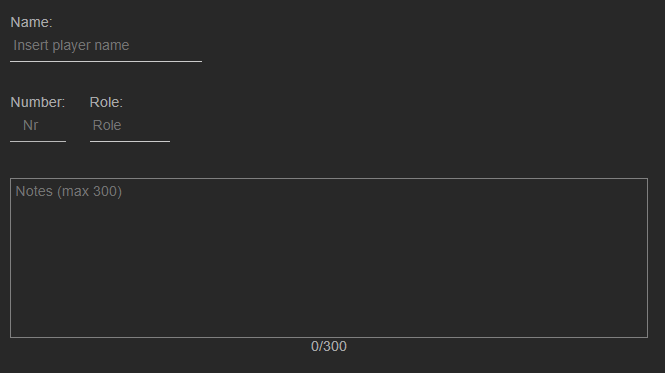
Player name, which must be up to 23 characters long.Role of the player (optional), which must consist of a maximum of three characters.
Player number (optional) within the range 0-99.
Notes or further information relating to the player (optional), which must be composed of a maximum of 300 characters.
![]() At
the end of entering the user data, it is necessary to press the
"Save"
button to complete the creation of the player who will now appear in
the list of team players. It is possible to create up to a maximum of
23 players for each team.
At
the end of entering the user data, it is necessary to press the
"Save"
button to complete the creation of the player who will now appear in
the list of team players. It is possible to create up to a maximum of
23 players for each team.
6.2: Editing the players of the team
![]() By
pressing the edit button, located in the Team Player
Management panel for each player in the list and represented by a
pencil, the user triggers access to the player's edit panel.
By
pressing the edit button, located in the Team Player
Management panel for each player in the list and represented by a
pencil, the user triggers access to the player's edit panel.
Here the user can modify or provide the following features:
• Player name, which must be up to 23 characters long.
• Player role (optional), which must consist of a maximum of three characters.
• Player number (optional) included in the range 0-99.
• Notes or additional information relating to the player (optional), which must be composed of a maximum of 300 characters.
6.3: Removing the players of the team
![]() By
pressing the delete button, located in the team's Player
Management panel for each player in the list (represented by a trash
can), the user triggers the permanent deletion of the player from the
team and tournament.
By
pressing the delete button, located in the team's Player
Management panel for each player in the list (represented by a trash
can), the user triggers the permanent deletion of the player from the
team and tournament.
Upon confirmation of the operation by the user, the player is permanently removed from the system. This means that:
the player will no longer be visible or editable from the list of team players;
the player will no longer be present in the statistics graphs of the team's players;
the player will no longer be present in the top scorer;
the player will no longer be present in the match’s player management screens;
it will no longer be possible to exchange the player between teams.
6.4: View of the player parameters
By pressing on the player line in the Player Management panel, the user triggers access to the player display panel. Here the following parameters are displayed more extensively:
player name;
role (if provided);
number (if provided);
notes or additional information relating to the player (if provided).
6.5: Players exchange
Refer to Paragraph 3.2.
Section 7: Crest Creator
This module is available only by using “A. Championship & Tournament Desktop”. It is not available on the mobile app.
The user who can edit the tournament is also able to create and edit the club crest of each team they can access. Only the creator itself of the crest is able to edit or copy it. The other users that are able to edit the same team are allowed only to assign a brand new crest to the team, created by them, but they are not allowed to edit the one created by another user profile.
A user can create at most 30 crest. Once reached the limit, the user can delete the older crests to create new ones. The deleted crests are still visible and assigned to their team, but they will not be editable or duplicable.
For create or edit the crest the user can access the Club Crest Creator Panel from two points:
While creating a new tournament the user can check the “Show Crest” checkbox on each team and then access the panel clicking on the crest image. It is possible to perform this operation for each team created in the New Championship screen. This hides the club colors in favour of the club crest (it is possible to switch them back by unchecking the same field) (Paragraph 1.5).
in the Team Management screen the user can access the panel by clicking on the edit pencil at the right of the “Crest:” field or, if the club colors are shown instead of the crest, checking the “Show Crest” checkbox before (this operation hides the club colors in favour of the club crest, it is possible to switch them back by unchecking the same field) (Paragraph 4.3).
7.1: Coping a crest
On the top of the Club Creator Panel (or on the left, depending on the window size) it is available a browser which contains all the previews of the crests created by the user in all their tournaments. Clicking on one of these previews, the user can copy all the parameters of that crest to assign it to the current selected team or change it slightly before assigning it on the current selected team.
Saving a crest after copying it generates a duplicate of it, and not an assignament of the same crest to one or more teams. To assign the same crest to more teams it is necessary to copy the team on the New Championship screen while creating a new tournament.

7.2: Deleting a crest
The deleted crests are still visible and assigned to their team, but they will not be editable or duplicable.
By clicking on the trash can on the bottom right corner of the crest's preview, the user can delete the crest. Cancellation makes further modifications or copies of the crest impossible, but the teams which the crest assigned to them will continue to show it in the various screens (standings, top scorers ranking, matches etc …) until the “Show crest” field in the Team Management screen is unchecked by the user.
7.3: Crest creation and editing
In the Crest Panel is possible to edit several attributes through the editing parameters.
7.3.1: Crest shape
The user can select the shape of the crest, every consequent drawing will be rendered inside the shape, except for the plant decorations and the stars.
The shape is selectable through the drop-down menu “Shape”.
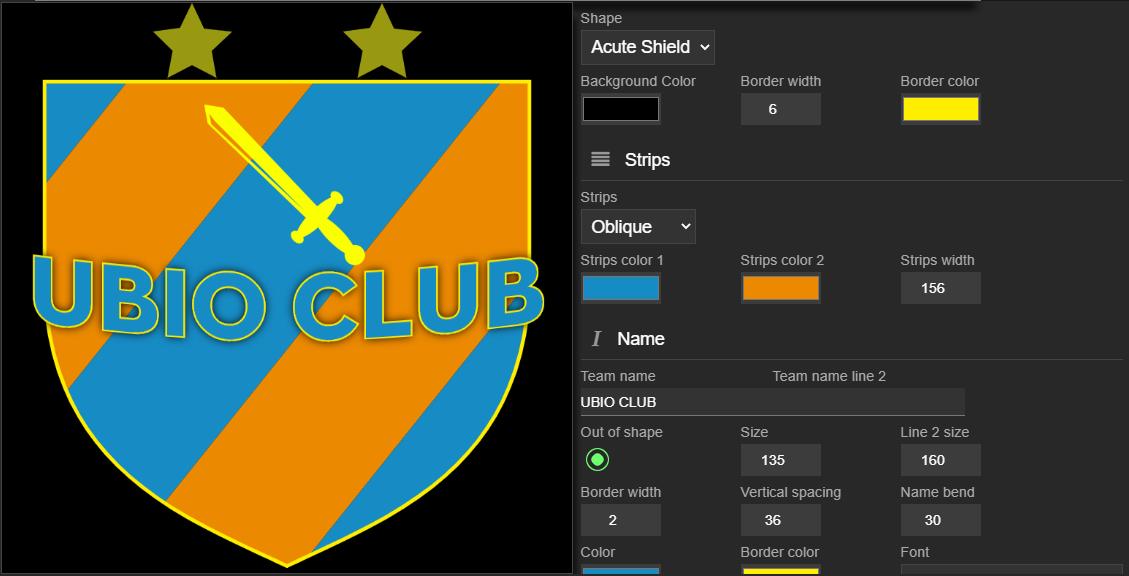 Between
the available shapes there are: the square, the oval, the shield, the
Circle and the Rhombus. It is also possible to set the background
color of the shape, and the border width and color.
Between
the available shapes there are: the square, the oval, the shield, the
Circle and the Rhombus. It is also possible to set the background
color of the shape, and the border width and color.
7.3.2: Strips
The user can configure the strips that will fill the shape. The strips parameters are:
Direction
None: the shape is filled with the background color;
Vertical
Horizontal
Oblique
Colors of the strips
The width of the strips
7.3.3: Name text
There are many parameters to setup the team name drawing text:
name text: the user can type the text they want to draw into the “Team name” field;
second line name text: the second line of the name that is drawn just below the main line using the same font and colors;
“Out of shape” options: if selected the name text is drawn over the plant and outside the shape. If this options is deselected the text is brought behind the plant and is drawn only inside the edges of the shape;
text size;
second line text size;
vertical spacing; amount of distancing between the main text line and the second name line;
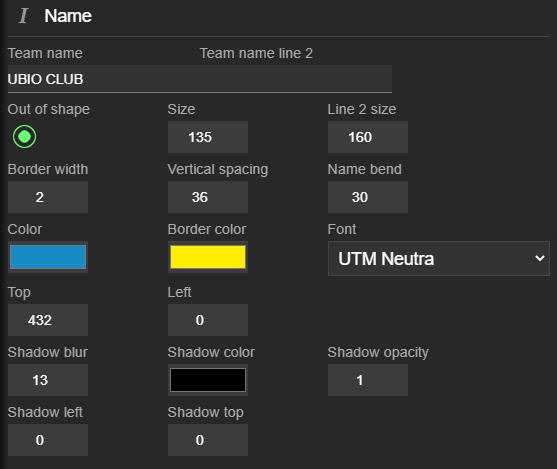 text
border
width;
text
border
width;color of the text;
color of the text border;
font of the text;
name’s bend: 0 to draw a straight horizontal text, negative value to curve the bend up, positive value to curve the bend down;
vertical position of the text (“Name top”);
horizontal position of the text (“Name left”);
text shadow: the user can customize the text projected shadow by setting:
the amount of blur;
the color;
the opacity;
the horizontal and vertical shift of the shadow from the text.
7.3.4: Stars
 The
user can indicate how many stars draw on the top of the team's
crest (outside the shape).
The
user can indicate how many stars draw on the top of the team's
crest (outside the shape).
Usually the stars represent the milestones achieved by the club (such as an high number of trophes or a ten of championships won).
![]() The
shape is automatically resized to leave space to the stars. It is
also possible to setup the color and the size of the
stars. Set 0 stars to draw no stars and to make the
shape fill all the available space on the canvas.
The
shape is automatically resized to leave space to the stars. It is
also possible to setup the color and the size of the
stars. Set 0 stars to draw no stars and to make the
shape fill all the available space on the canvas.
7.3.5: Plant
 The
user can decorate the shape with a kind of plant or a kind of
parchment. It is possible to select between a default set of
decorations and to setup the color, the position and
the size of the plant.
The
user can decorate the shape with a kind of plant or a kind of
parchment. It is possible to select between a default set of
decorations and to setup the color, the position and
the size of the plant.
7.3.6: Symbol
The user can add a symbol to the crest, setting also the color, the size and the position of it. Currently is available a suite of more than 25 symbols.
To move and place the symbol the user has to drag and drop it directly with the mouse. To drag the symbol is necessary to click on the symbol and, holding down the mouse, move it to place it. Then release the mouse button to end the placement.
7.3.7: Custom images
The
user can load three different custom images from their device and
place and resize them inside the shape of the club crest. The user
can remove
the images or edit the size
using the corrispective button and the fields. To move and place the
images the user has
to
drag
and drop
them directly using the mouse. To drag the image is necessary to
click on the image and, holding
down the mouse, move it to drag the image. Then release the mouse
button to end the placement.

7.4: Saving crest
![]() The
user can save the crest by clicking on the “SAVE”
button. The saving causes the creation of the crest, if new, or the
saving of the new modifications executed on the existing crest.
Anyway the saving perform the assigning of the crest to the team
selected (the team from which the user accessed the Crest Creator
Panel).
The
user can save the crest by clicking on the “SAVE”
button. The saving causes the creation of the crest, if new, or the
saving of the new modifications executed on the existing crest.
Anyway the saving perform the assigning of the crest to the team
selected (the team from which the user accessed the Crest Creator
Panel).
7.5: Export crest image
![]() The
user can export the crest they are creating or editing and save it as
an image (with Portable Network Graphics extension) on its device by
clicking on the “Export PNG” button.
The
user can export the crest they are creating or editing and save it as
an image (with Portable Network Graphics extension) on its device by
clicking on the “Export PNG” button.
It is possible to perform this export even without saving the crest.